Job Career theme offers special custom fields that user can get benefit from them. To add custom fields for employers navigate: Jobs / Settings / Custom fields / Recruiter( Employer) Custom fields. Admin can add following custom fields options with in few clicks.
- Text
- Text Area
- Drop down
- Date
- URL
- Range
How to add Custom fields?
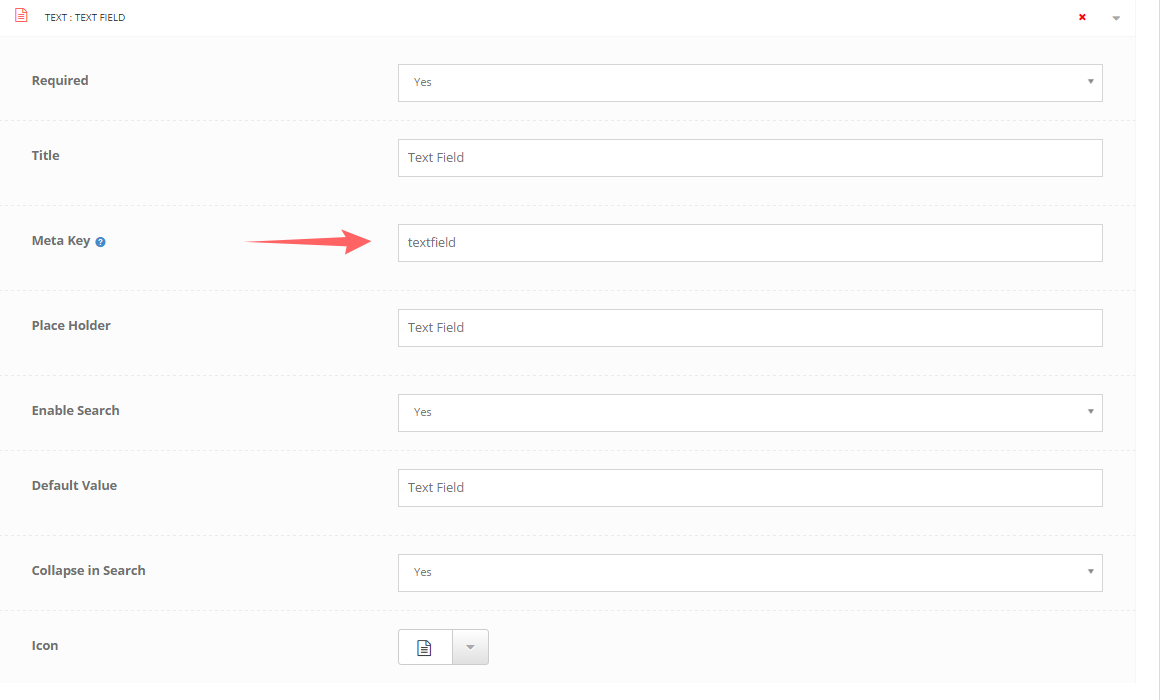
Add Text Field Click to add Text icon the drop down appear where you must fill all parameters accordingly.
- Select Required (Field should be required to fill or not)
- Add Title
- Enter Meta Key (Meta key should be valid, if your Meta key is not appropriate then custom field might not work efficiently.)
- Place Holder (Add Field placeholder)
- Enable Search
- Default Value
- Collapse in Search
- Icon (Select Icon from the icon box)
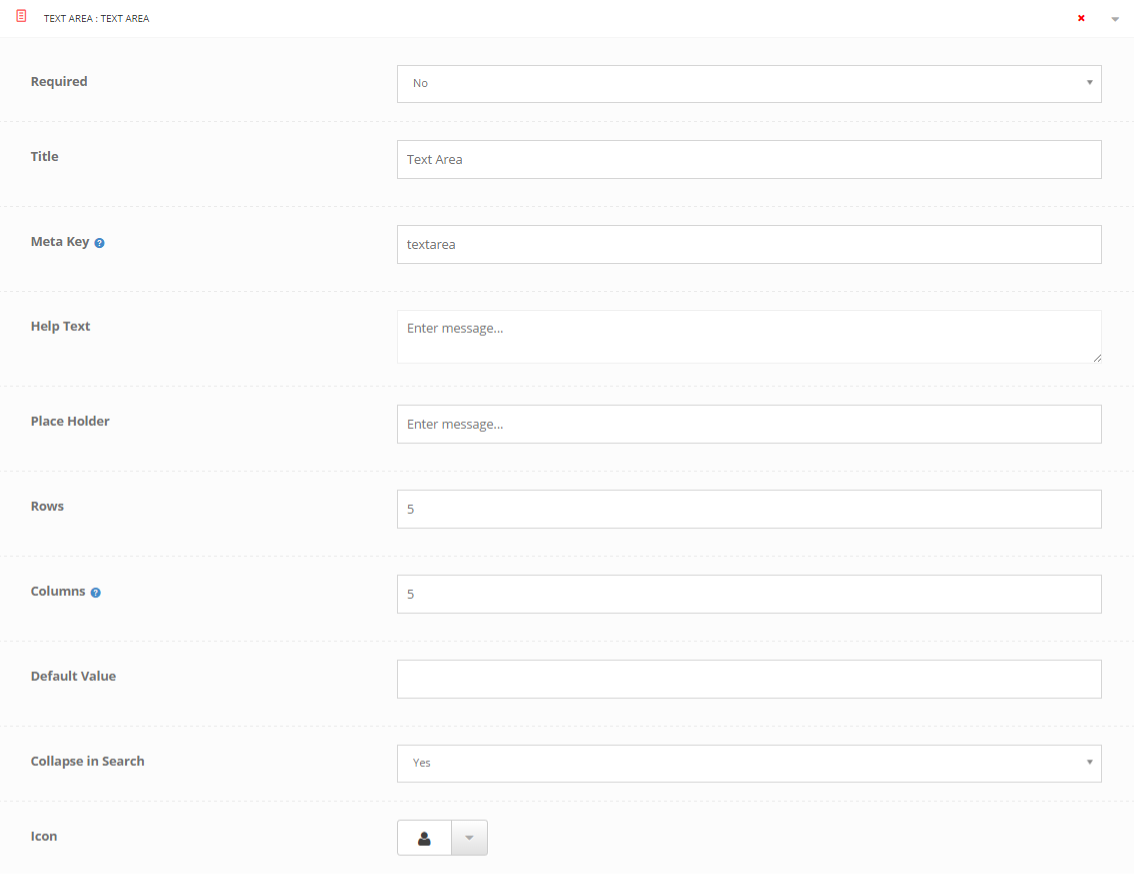
Add Text Area Field Click to add Text Area icon the drop down appear where you must fill all parameters accordingly.
- Select Required (Field should be required to fill or not)
- Add Title
- Enter Meta Key (Meta key should be valid, if your Meta key is not appropriate then custom field might not work efficiently.)
- Help Text
- Place Holder (Add Field placeholder)
- Add Rows (How many rows you need to display for text area)
- Add Columns (How many Columns you need to display for text area)
- Default Value
- Collapse in Search
- Icon (Select Icon from the icon box)
Add Drop Down Field Click to add Drop Down icon the drop down appear where you must fill all parameters accordingly.
- Select Required (Field should be required to fill or not)
- Add Title
- Enter Meta Key (Meta key should be valid, if your Meta key is not appropriate then custom field might not work efficiently.)
- Help Text
- Enable Search (Search enabled)
- Enable Multi Select
- Post Multi Select
- First Value
- Collapse in Search
- Icon (Select Icon from the icon box)
- Options (Drop down option with labels)
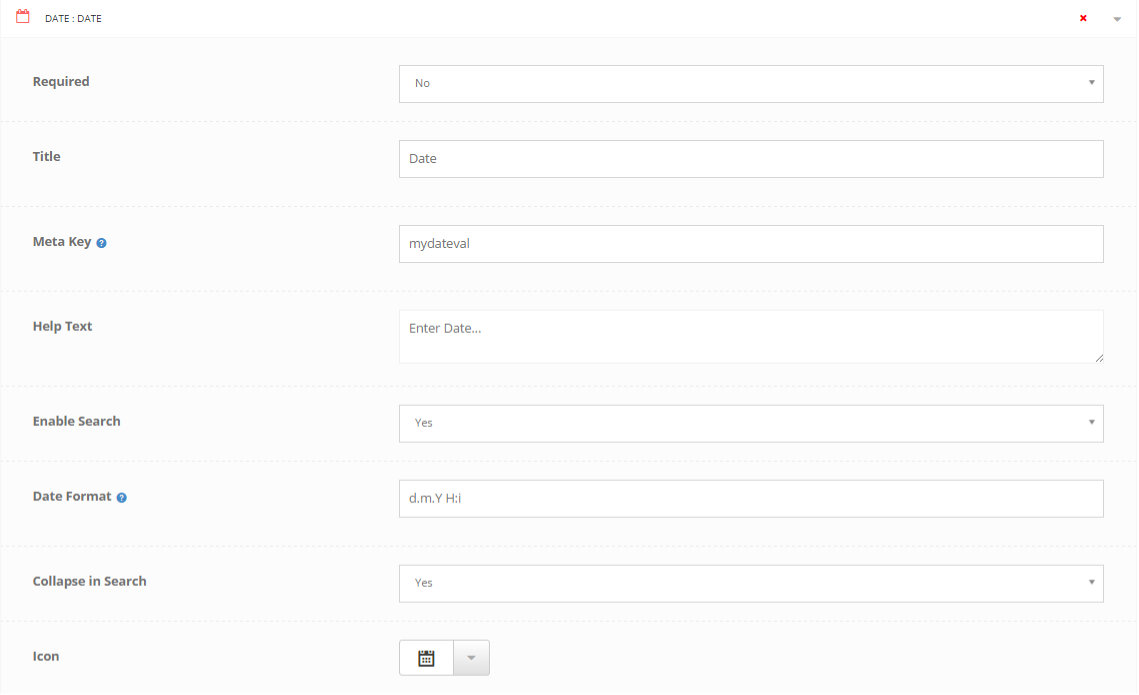
Add Date Field Click to add Date icon the drop down appear where you must fill all parameters accordingly.
- Select Required (Field should be required to fill or not)
- Add Title
- Enter Meta Key (Meta key should be valid, if your Meta key is not appropriate then custom field might not work efficiently.)
- Help Text
- Enable Search
- Date Format
- Collapse in Search
- Icon (Select Icon from the icon box)
Add Email Field Click to add Email icon the drop down appear where you must fill all parameters accordingly.
- Select Required (Field should be required to fill or not)
- Add Title
- Enter Meta Key (Meta key should be valid, if your Meta key is not appropriate then custom field might not work efficiently.)
- Help Text
- Enable Search
- Default Value
- Collapse in Search
- Icon (Select Icon from the icon box)
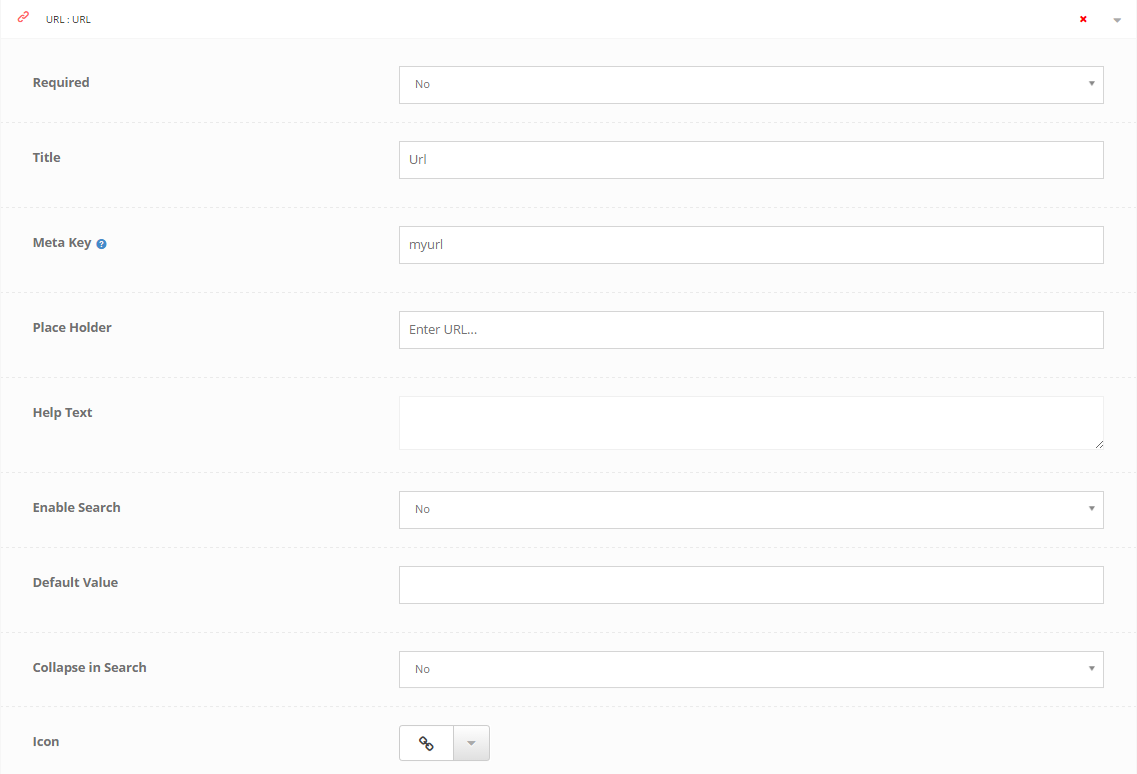
Add URL Field Click to add URL icon the drop down appear where you must fill all parameters accordingly.
- Select Required (Field should be required to fill or not)
- Add Title
- Enter Meta Key (Meta key should be valid, if your Meta key is not appropriate then custom field might not work efficiently.)
- Help Text
- Enable Search
- Default Value
- Collapse in Search
- Icon (Select Icon from the icon box)
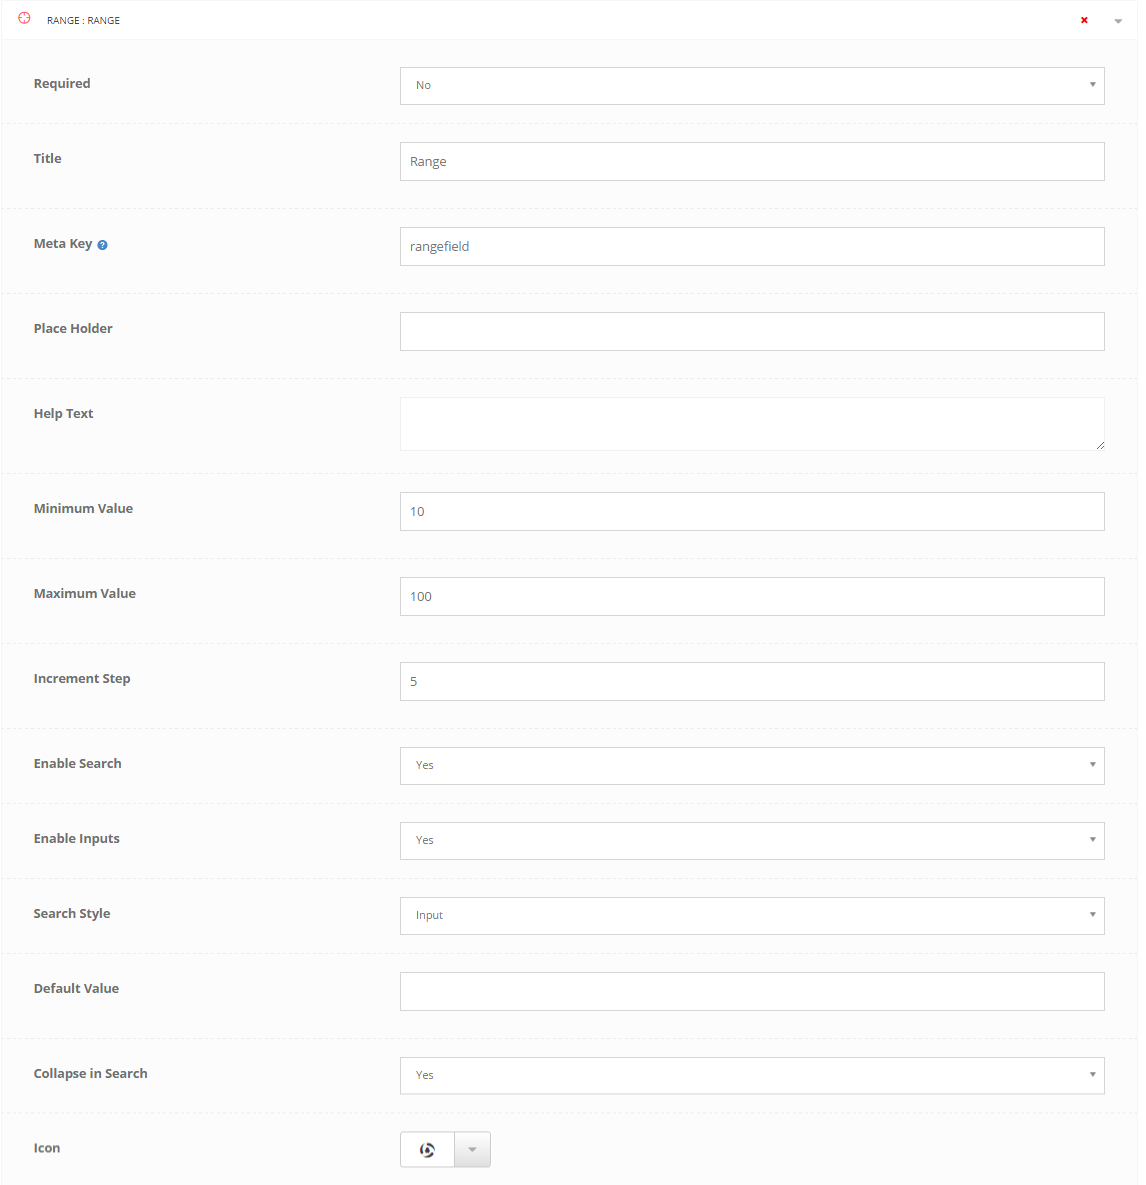
Add Range Field Click to add Range icon the drop down appear where you must fill all parameters accordingly.
- Select Required (Field should be required to fill or not)
- Add Title
- Enter Meta Key (Meta key should be valid, if your Meta key is not appropriate then custom field might not work efficiently.)
- Help Text
- Minimum Value (Minimum value where Range starts)
- Maximum Value (Maximum range value)
- Increment Step (Step where Increment range holds)
- Enable Search
- Enable Inputs
- Default Value
- Collapse in Search
- Icon (Select Icon from the icon box)

